How to install LUKS encrypted Ubuntu 18.04.x Server and enable remote unlocking
Much has been changed since my last post about LUKS remote unlock workaround (Particularly, The bug is finally fixed in cryptsetup 2:2.0.2-1ubuntu1.1 and no more workaround is needed). This, is the updated version on how to set things up properly.
UPDATE: Well, it turned out that while the previous bug is fixed, another one still exists. You can find the required workaround for it at the end of this article
In this post, I’m going to show you the required steps and downfalls on running a LUKS encrypted Ubuntu Server setup and how it can be extended to allow remote unlocking.
Prerequisites
- A server to install on
- Static public IP address
- The so called Alternative Ubuntu Server installer1
- Some patience 🙂
Installing and Setting up encrypted LVM
It is assumed that you already know your way around ISO files and how to boot them on your server.
We will also use the simplest possible setup: A server with a single disk
We are going to use LVM inside the LUKS container, it is not only supported, but the recommended way as we could also make use of advanced LVM functionalities later on.
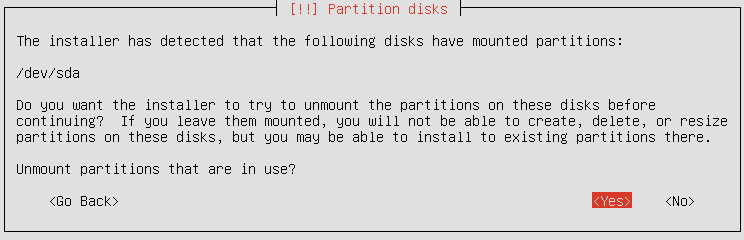
Follow the installation until you reach the disk partitioning section:
-
The disk might need to be unmounted first:
-
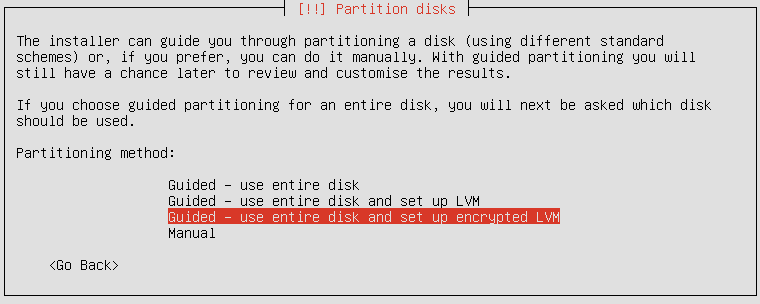
choose Guided - use entire disk and setup encrypted LVM option:
-
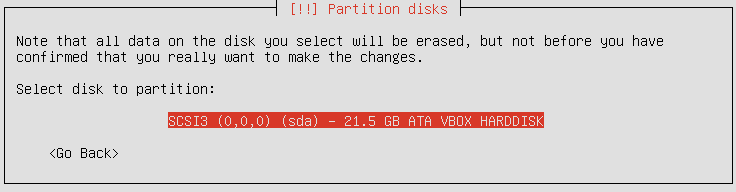
In the next window, take extreme care to select the right HDD in case you have multiple ones:
-
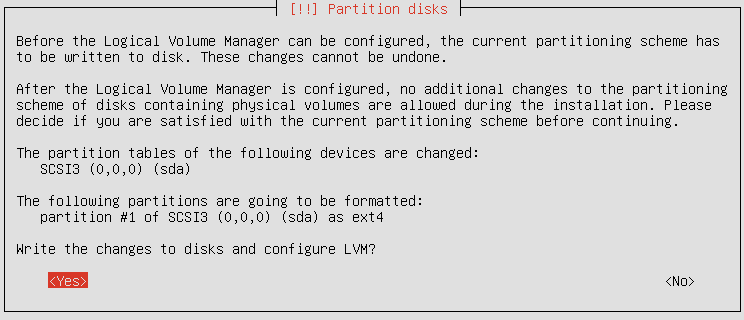
Confirm changing the partition scheme to LVM if it was asked for:
-
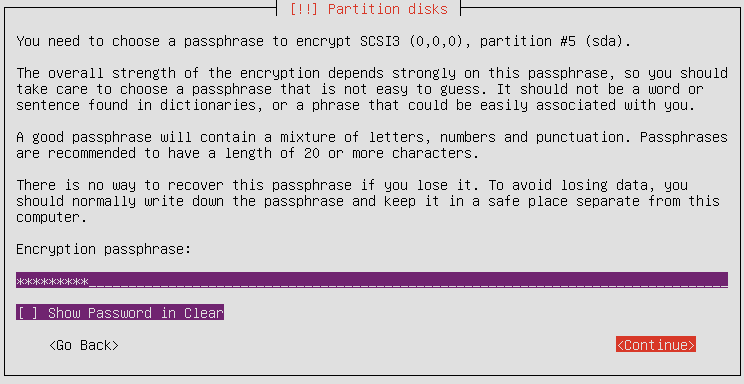
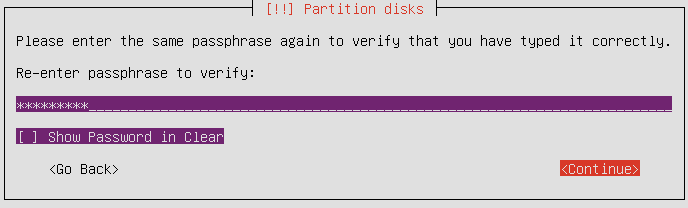
Setup a strong passphrase for LUKS and confirm it:
-
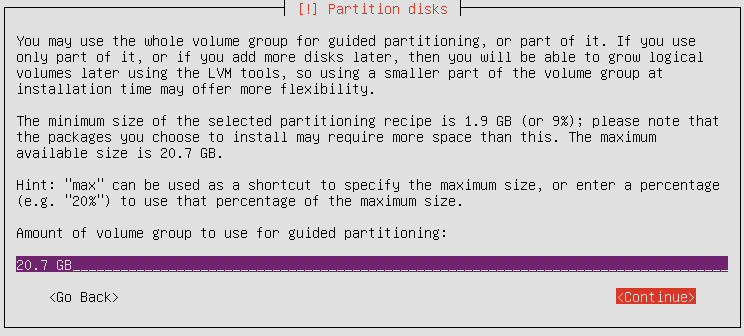
Decide on how much of the disk space you want to dedicate to the root partition. For advanced setups, you can use only a percentage of the available space and create more partitions later on (And all of them would be automatically encrypted). The default is to make a single partition the size of the HDD:
-
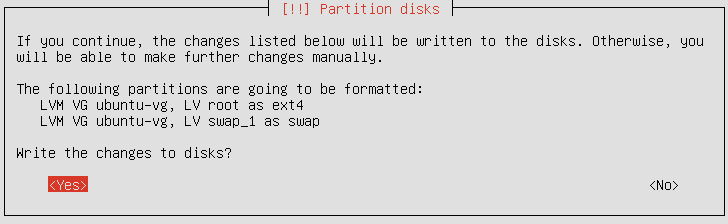
Confirm the partition setup and continue with the installation:
-
Since There is no other OS on this system, it’s safe to install GRUB boot loader:
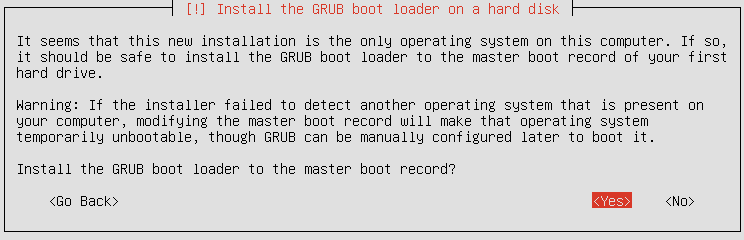
-
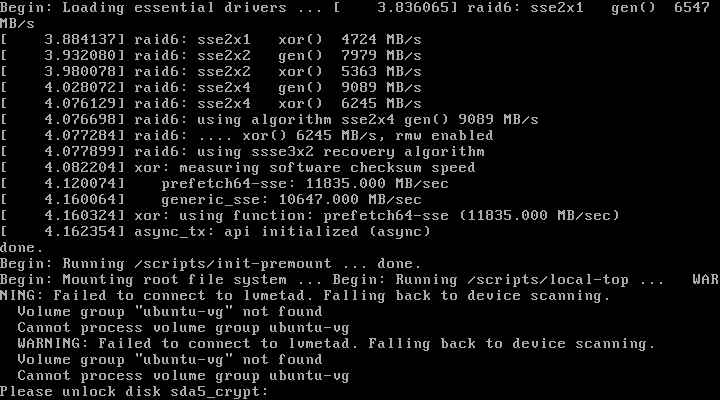
You will be prompted for the LUKS password after reboot to unlock the disk:
Our overall setup would be something like this:
NAME                     FSTYPE
sda
├─sda1                   ext4
├─sda2
└─sda5                   crypto_LUKS
  └─sda5_crypt           LVM2_member
    ├─ubuntu--vg-root    ext4
    └─ubuntu--vg-swap_1  swap
sda1is our boot partition. It is NOT ENCRYPTED2sda2marks the start of the logical partitionssda5is our encrypted LUKS partitionsda5_cryptis the virtual crypt partition after unlocking (which uses LVM)ubuntu--vg-rootis our root partitionubuntu--vg-swap_1is the swap partition
Remote unlocking overview
The process behind this fairly simple. The kernel loads initramfs image, inside this image are the required files/modules/scripts for decrypting/mounting root.
Now if we could somehow run a SSH server in initramfs and make it accessible via network, one could remotely connect to it to unlock root partition.
As initramfs runs in memory, we are somewhat limited in the size and complexity of the running programs. This is the main reason why Dropbear is being used as the SSH server combined with BusyBox to provide the shell and basic utilities.
sudo -i to root before continuing.
Update packages
Make sure your system (specially cryptsetup package) is up-to-date:
apt-get update && apt-get --assume-yes upgrade
Install Dropbear package for initramfs
As i said earlier, Ubuntu uses special Dropbear package to provide SSH server functionalities in initramfs environment with all the required hooks and scripts. Install it by issuing:
apt-get --assume-yes install dropbear-initramfs
If you get this warning while installing it, just ignore it for now, we will fix it soon enough:
dropbear: WARNING: Invalid authorized_keys file, remote unlocking of cryptroot via SSH won’t work!
Dropbear SSH keys
When you install the package for the first time, it also generates dss,rsa and ecdsa host keys3 placed in /etc/dropbear-initramfs/.
Although possible, It is not wise to share your real OpenSSH host keys with the dropbear-initramfs ones. This is because for the keys to be accessible by the SSH server, they must not be encrypted (The same also applies to the initramfs itself as the kernel needs to be able to load it).
This means that even on a fully encrypted root system, physical access would be enough to retrieve the dropbear-initramfs private keys (unless boot partition is also encrypted. That unfortunately however, would also render our remote unlocking approach useless)
The downside of using a different private key for the Dropbear server, is that it will likely result in the client getting a scary warning about the possibility of a man-in-the-middle attack. This is because the server keys would be different before/after unlocking the root partition. The simplest (and possibly the best) way to avoid this issue, is to run the Dropbear SSH instance on another port. We will cover this shortly.
Dropbear config file
Dropbear’s config file for the special dropbear-initramfs package, are placed in /etc/dropbear-initramfs/config
Changing default port
For the reason discussed above, we’re better off using a custom port to listen on. This also would have the advantage of reducing attacks on the server, as no firewall is running in initramfs environment.
To make it listen on port 4748, edit the said config file and add the following line:
DROPBEAR_OPTIONS="-p 4748"
Alternativ method:
A user reported that for some reason, the above method did not work for him and he added the same line to /etc/initramfs-tools/initramfs.conf instead.
Please note that this would result in these messages when rebuilding initramfs later on:
dropbear: WARNING: Setting DROPBEAR_* or PKGOPTION_dropbear_* in /etc/initramfs-tools/initramfs.conf is deprecated and will be ignored in a future release dropbear: WARNING: Use /etc/dropbear-initramfs/config instead
Further adjustments
I have also added -s -j -k -I 60 to DROPBEAR_OPTIONS just for the peace of mind. See man dropbear for details.
SSH Authentication
Password login has been disabled for dropbear-initramfs and only publickey authentication is allowed. Public keys should be placed in /etc/dropbear-initramfs/authorized_keys, one entry at a line. rsa based authentication is advised over ecdsa and dss.
You can also limit shell access to unlocking encrypted root partition only, by adding further per-user limitations in authorized_keys file like this:
no-port-forwarding,no-agent-forwarding,no-x11-forwarding,command="/bin/cryptroot-unlock" ssh-rsa ...
/etc/dropbear-initramfs/authorized_keysFor rsa, it’s default location on the client is
~/.ssh/id_rsa.pubYou might need to issue
ssh-keygen on the client first if this hasn’t been done already.
After changing Dropbear’s settings, do not forget to regenerate initramfs:
update-initramfs -u
This time, no error should appear.
Kernel IP parameters
Make sure the “.yaml” file(s) in your “/etc/netplan/” folder, is not named after your physical NIC’s (e.g., if your NIC is “ens5”, you should not use a file named “ens5.yaml” as your netplan configuration), that’s just asking for trouble. By default this file is called something like “01-netcfg.yaml”, which is fine.
Thanks to the user Achim for finding that out.
Connecting remotely to the SSH server, would require the kernel to be able to setup network interfaces properly.
This would require that the kernel to first recognize the network interface (which is usually the case4), and also be able to setup IP parameters correctly.
Setting up static IP
The default kernel’s behavior is getting the IP address via dhcp (ip=dhcp). If your network lacks a DHCP server, special kernel boot IP parameter is needed. This would usually be in the form of:
ip=<client-ip>::<gw-ip>:<netmask>5
Append that to the GRUB_CMDLINE_LINUX_DEFAULT parameter in /etc/default/grub and regenerate GRUB config file:
update-grub
Alternativ method:
A user reported that for some reason, the above method did not work for him and instead he added this line to /etc/initramfs-tools/initramfs.conf:
IP="<client-ip>::<gw-ip>:<netmask>::eth0:off"
The above line, uses the same structure for most part. Except that its location is different and it uses the capital IP variable.
And then of course rebuild initramfs: update-initramfs -u
Fixing dorpbear-initramfs
This is a long story, but basically, there is an inconsistency between the dropbear-initramfs and busybox-initramfs packages.
After a complete setup, this problem manifests itself in these forms:
- Remote SSH sessions might not get closed automatically after a successful remote LUKS unlocking.
- You will get a couple of
pserrors in your terminal right after LUKS unlocking. - You might get this scary message in your terminal after boot up:
Aiee, segfault! You should probably report this as a bug to the developer
- Your network interfaces might refuse to automatically come up after a successful boot.
PS: I have yet to confirm whether the last issue in this list, does in fact have something to do with this bug. So if you believe that after applying the workaround, it fixes your specific issue, please let me know in the comments section below.
To overcome this, I have written a small script to address the issue in the most non-aggressive way I could think of. More information on how to download and apply it, could be found here: dropbear-init-fix
You are advised to apply this workaround, but you may as well skip it and settle with the buggy version of the dropbear-initramfs package.
The result
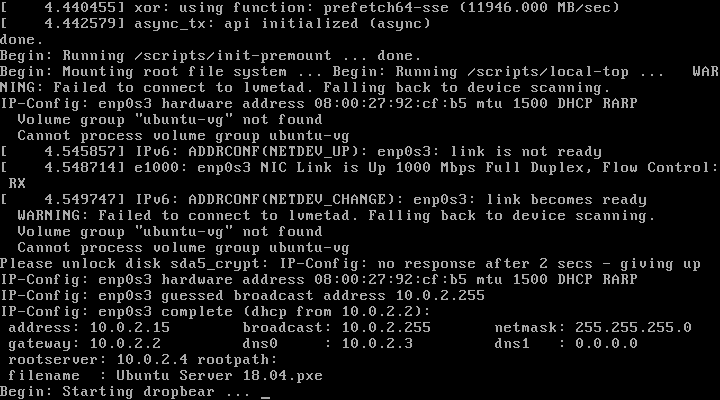
At this point if you have set up everything correctly, after a restart and right after the kernel loads initramfs, network’s IP settings would be applied. Dropbear would start shortly after, listening for new connections:
And now we could connect to the Dropbear server remotely:
ssh -o "HostKeyAlgorithms ssh-rsa" -p 4748 root@client-ip
Which brings us to the BusyBox built-in shell:
To unlock root partition, and maybe others like swap, run \`cryptroot-unlock\`


BusyBox v1.27.2 (Ubuntu 1:1.27.2-2ubuntu3) built-in shell (ash)
Enter 'help' for a list of built-in commands.

#
cryptroot-unlock command is all that stands now between you and booting up your server!
-
The live version lacks the required steps necessary for setting up LVM and encryption. At the time of writing, the latest version is
18.04.5and can be downloaded from This Link. You’d probably want to download theubuntu-18.04.5-server-amd64.iso. ↩︎ -
While GRUB2 now supports unlocking an encrypted boot partition, I do not believe that it could be setup to do so remotely. ↩︎
-
Dropbear does not seem to be supporting
ed25519↩︎ -
If not, the module must be included in initramfs. Refer to
/usr/share/doc/dropbear-initramfs/README.initramfsfor details ↩︎ -
Take a look at nfsroot.txt ↩︎