How to properly remove LuCi from OpenWrt
Overview
LuCi is a very popular OpenWrt web interface. For an average user, LuCi is probably one of the main deciding factors between giving OpenWrt a try in the first place, or moving on to another user friendlier firmware like DD-WRT.
If you’re an advanced user however, most of the times you may find yourself adjusting settings either through UCI or by editing the config files manually. In fact at one point you may realize you’re not using LuCi at all and it’s just sitting there idle. Basically a component that’s not only using resources, but also providing an extra attack surface.
Now, one could just disable uHTTPd to address some of these concerns, but LuCi installs too many dependencies, and cluttering a router with things that you’ll hardly ever use, is not the best use of the very limited storage space available in most routers.
Another method that some use to “remove” LuCi, is by issuing:
opkg --autoremove remove luci
This may seem to work, but in reality LuCi packages are not really removed this way and the related files will only be masked by OverlayFS. This is because the packages are built into the firmware itself.
While OpenWrt snapshot releases, deliberately exclude LuCi from the build, they are not suitable for production use. So that leaves us with OpenWrt stable releases which of course come with the LuCi packages built-in.
In this post I’m going to give you two different methods for building your own customized firmware to exclude LuCi. Both of these methods can be used to produce pretty much the same result, but they are suitable for different situations.
After removing LuCi from the firmware, you can simply install LuCi later on if you want so. You just need to have the necessary knowledge to initially connect your router to the internet using CLI (e.g., through UCI). So you’re basically not losing anything by excluding LuCi.1
Using Image Builder
Using Image Builder is the preferred method and you most likely want to go down this road. The process is very fast and simple, and you pretty much don’t need to worry about anything. It just works.
OpenWrt Image Builder documentation, does a perfect job explaining how one can build a customized firmware using it.
For extra clarity however, we’re going to review the steps necessary for building lets say OpenWrt v18.06.4 for x86-64 architecture:
1. Prepare the build system
You probably already know how to do this. Basically you need a 64bit Linux system with the required packages installed. The list of required packages, can be found in Image Builder prerequisites and possibly Build system prerequisites.
2. Get the right Image Builder archive
The official Image Builder archive for your device, is available in the same location as the firmware itself. In our example, we can get the correct archive like this:
wget https://downloads.openwrt.org/releases/18.06.4/targets/x86/64/openwrt-imagebuilder-18.06.4-x86-64.Linux-x86_64.tar.xz
3. Extract the Image Builder archive
Simply use GNU tar to do so:
tar -xf openwrt-imagebuilder-18.06.4-x86-64.Linux-x86_64.tar.xz &&
cd openwrt-imagebuilder-18.06.4-x86-64.Linux-x86_64/
4. Make the image
One of the beautiful things about the Image Builder, is that by default it includes only the essential packages required for the proper functionality of your device. That means LuCi packages are excluded.
Of course you can always instruct the Image Builder to include more packages if you want, but if you’re only going through this process to exclude LuCi, you don’t need to.
make help to see the available commands and possible variables.
You may also want to manually specify Image Builder target profile instead of relying on the default one. Use make info to see the available target profiles for this Image Builder, and then choose the right one for your router from the list (you will pass this as the PROFILE= argument to the make image command).
So in the above example, the required command for building the final image for x86-64 architecture would be something like this:
make image PROFILE=Generic
If everything goes fine, at this stage Image Builder automatically downloads all the required packages from the official repository and puts them the together to make a ready-to-use firmware. This process is usually very fast and takes only couple of minutes.
./bin/ directory tree.
Using build system
Sometimes you may need to build the whole OpenWrt stack from scratch. This might be due needing to change some kernel settings, patching part of it, etc. For this, you would use the build system.
This is a lengthy process but again OpenWrt documentation does perfect job covering the whole thing. Basically first you need to prepare your build system, and then go on to compiling OpenWrt. So take your time and familiarize yourself with the process first.
Default configuration
If you don’t import any config file from an external source and instead use make menuconfig to set your Target, Subtarget and Profile, then only essential packages for the functionality of your router will be included.
This means that just like the Image Builder approach, LuCi will not be included by default. So basically continue with your build and don’t worry about it!
Using config.seed
In the previous post on How to compile OpenWrt and still use the official repository, we talked about how you can take advantage of a file called config.seed to build OpenWrt in a way that makes it possible to effectively use official repositories later on2.
This section is related to that post, adding a single extra step to the process.
Once you’ve imported the config.seed file, and right before using make defconfig, open the file and remove all trace of CONFIG_PACKAGE_* lines as shown below.
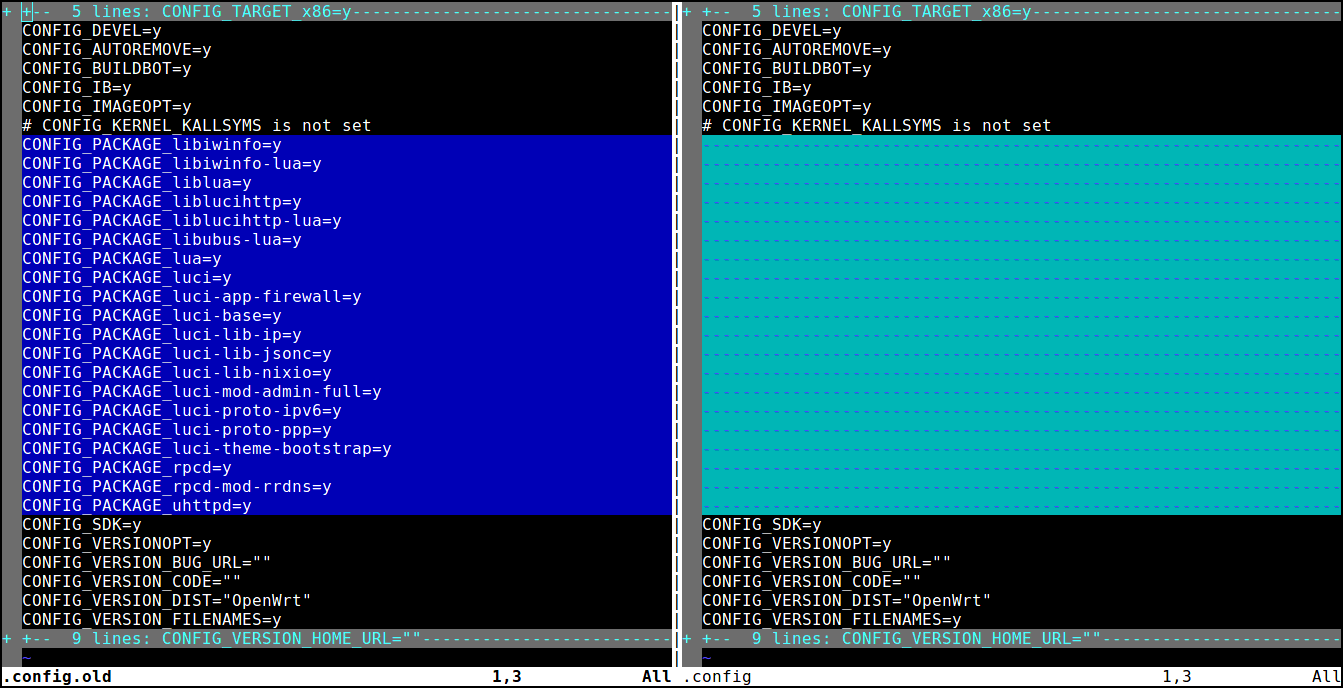
The packages needed for the proper functionality of your device, are already included by default and those that are listed in config.seed file, are all non-essential LuCi related packages and can be removed3.
After this step, you can continue with the build process.
And that’s it for this post. As always, I’d like to know your thoughts on it. Please share them with me in the comment section below.
-
Well, technically installing a separate package (as opposed to integrating it into the firmware), would take slightly more space. ↩︎
-
This does not apply to the Image Builder approach. Using Image Builder always results in a compatible firmware. ↩︎
-
In fact, one of the main differences between
config.seedfile in OpenWrt stable builds and snapshot ones, is that the latter do not include theCONFIG_PACKAGE_*lines. ↩︎